Crystal healing is an ancient form of self-care that is becoming more and more popular. This is because these beautiful stones allow us to heal ourselves spiritually and emotionally. They help us to reconnect with mother nature in this hectic modern world.
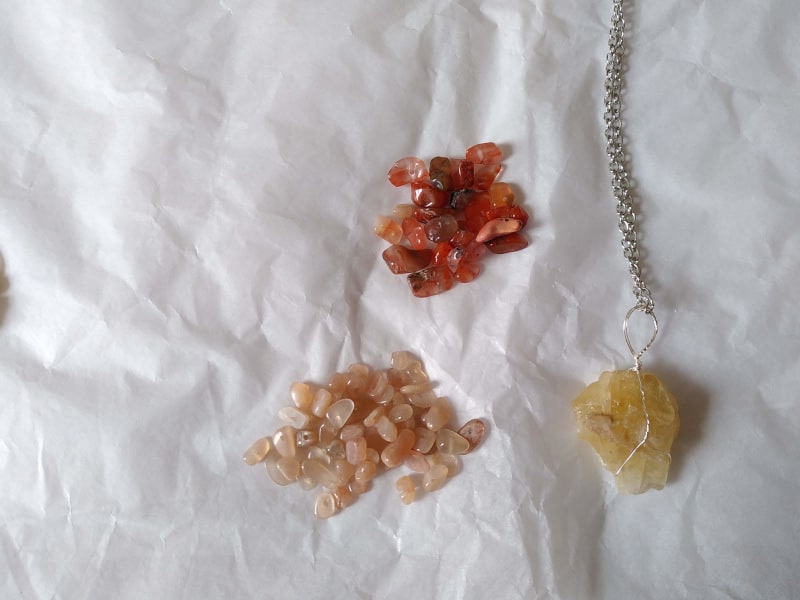
A brilliant way to use crystals for healing is with jewelry, and what better way to express yourself by creating things you can wear with gemstones!
In this article, I will provide you with step-by-step guides for crystal healing jewelry making. These necklaces and rings are super easy to make and allow you to feel the benefits of crystal healing wherever you go.
Why Choose Healing Crystals for Jewelry Making?
All crystals have specific healing energies. They are incredible tools and can help you in so many different ways, from improving your yoga practice to easing anxiety!
The vibrations from gemstones connect with your own energy and the energy around you. The come from the earth and connect you with the living planet and the elements. Crystals hold metaphysical properties that allow us to increase positivity and abundance in our lives.
What Are The Benefits of Wearing Crystals?
There are many ways to use healing crystals, from meditation to feng shui. However, a popular way of using gemstones for spiritual and emotional wellbeing is to wear the stones.
This means that the vibrations and energy from the crystals are constantly around you, connecting with your own energy.
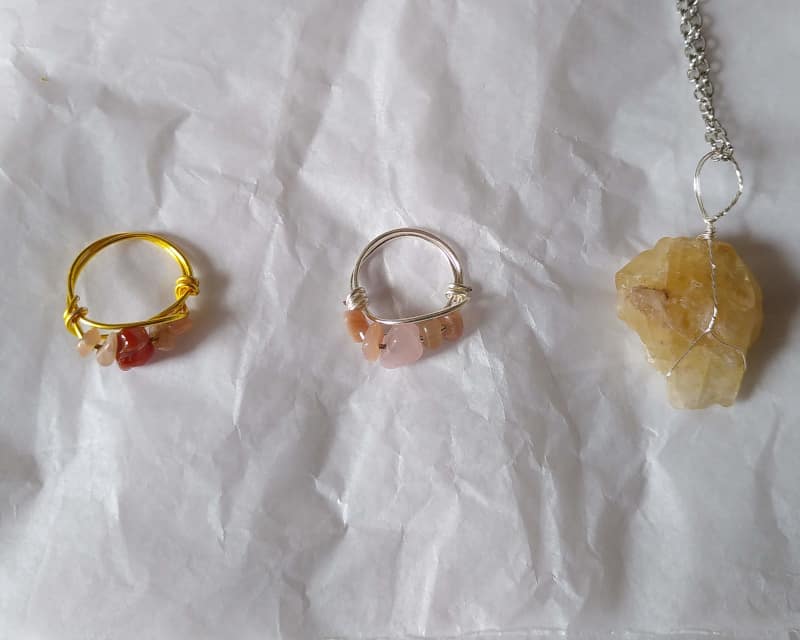
There are loads of options out there for gemstone jewelry and some beautiful products on offer. However, a lot of these can be very expensive! This is why I wanted to show you crystal healing jewelry making where you can create simple, beautiful pieces on a budget.
Making your own DIY gemstone jewelry also allows you to fully connect with the crystals and their healing and metaphysical properties. When making the jewelry, you are able to set intentions and charge the stones with your energy.
They also make amazing gifts for friends and loved ones if they are in need of a helping hand from the universe.
What Crystals Should You Use?
When it comes to choosing what gemstone to use for crystal healing jewelry making, you simply need to ask yourself what you need from the universe.
If you are prone to insecurities and stress, making a DIY crystal necklace with rose quartz will help you on your way to self-love.
If you are in need of protection from negativity, using black tourmaline or obsidian stones will give you what you need.

If you are new to crystal healing, check out my gemstone guide which describes the nine most famous gemstones and how they will help you.
DIY Crystal Necklace
Necklaces are a great way of wearing crystals as you can wear them at all times and hide them under your clothes if necessary. Necklaces are also close to our throat and heart chakras and therefore these chakras will be balanced by the crystals.
There are a few different ways of crafting gemstones into necklaces and a really simple way is to place them in gemstone cages.
You can pick up gemstone cages really cheaply online or in craft stores, and you can simply pop the gemstone in and put the necklace on!
I love gemstone cages as it means that you can change which crystal you have on the necklace depending on what you are needing.
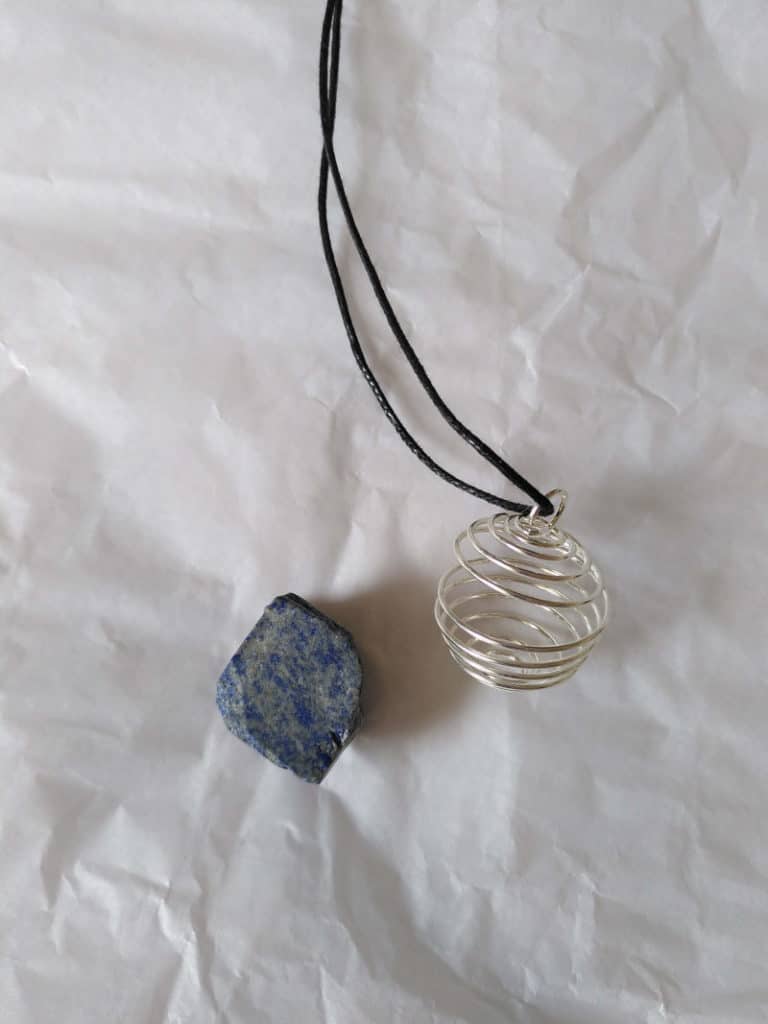

Let’s look at a different way of making necklaces with gemstones by using jewelry-making wire. These are really simple to do and look incredible once made!
What Will I Need?
- A healing crystal, roughly two or three inches in size. I am using this beautiful citrine stone to make my necklace.
- Thin jewelry-making wire. I use 0.3 mm (28 gauge), but you may prefer to use 0.5 mm (24 gauge) as it is a bit stronger!
- Scissors or pliers to cut the wire.
- Necklace chain.

Step By Step Guide for DIY Crystal Necklaces
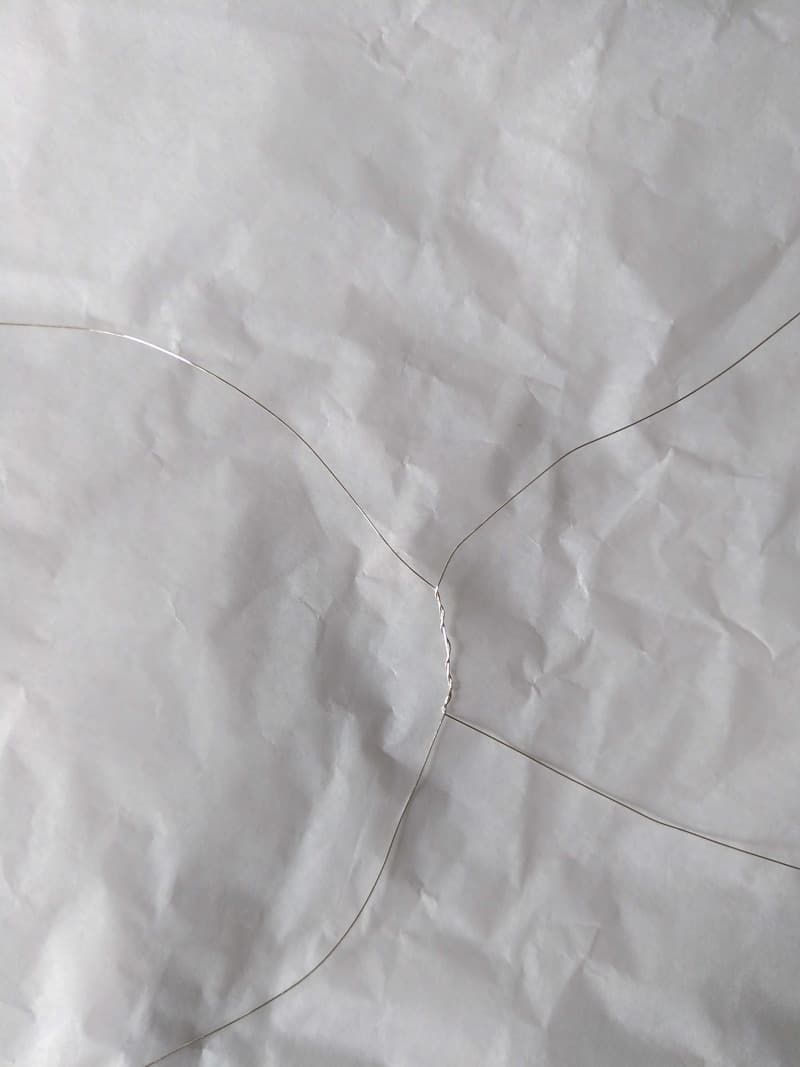
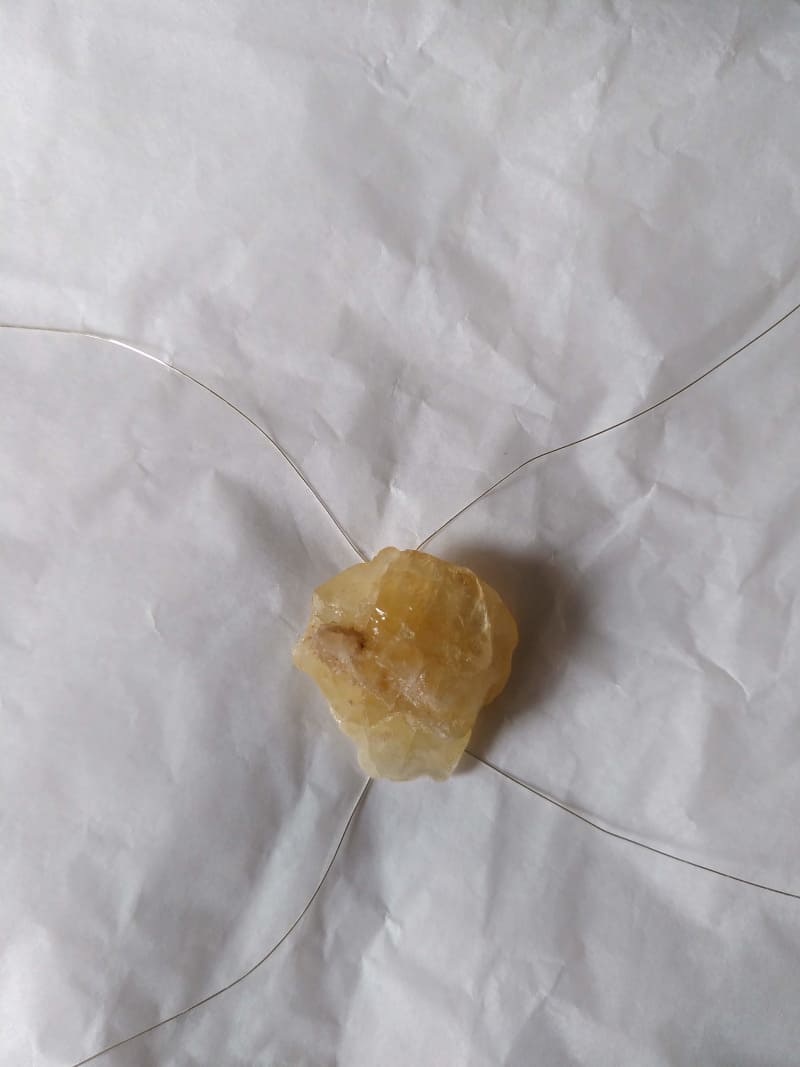
1 – Twist two lengths of wire together
Firstly, cut two lengths of wire of about 5 inches in length. Then, place the wires across each other touching in the middle, and twist them together.
Remember, it doesn’t have to look perfect! The beauty of crystal healing jewelry making is that it is personal, and homemade.
2 – Place the crystal onto the wire
Place the crystal that you are using onto the wire, with the twisted section on the back of the stone.
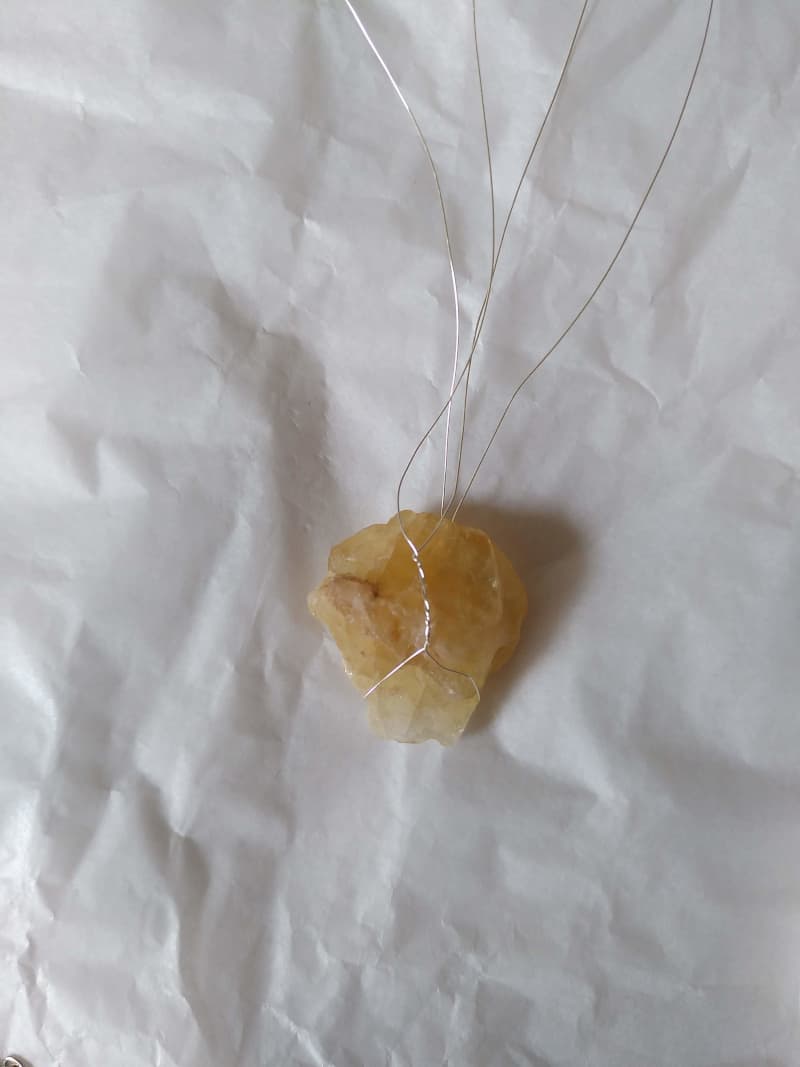
3 – Twist the wire together on the other side of the crystal
Now, this is the fiddly part! You want to make sure that the crystal is secure, so be gentle and take your time at the point. Bring the two bottom wires around the stone, forming a little basket. Pull the wires together and twist them just as you did for the other side of the stone.
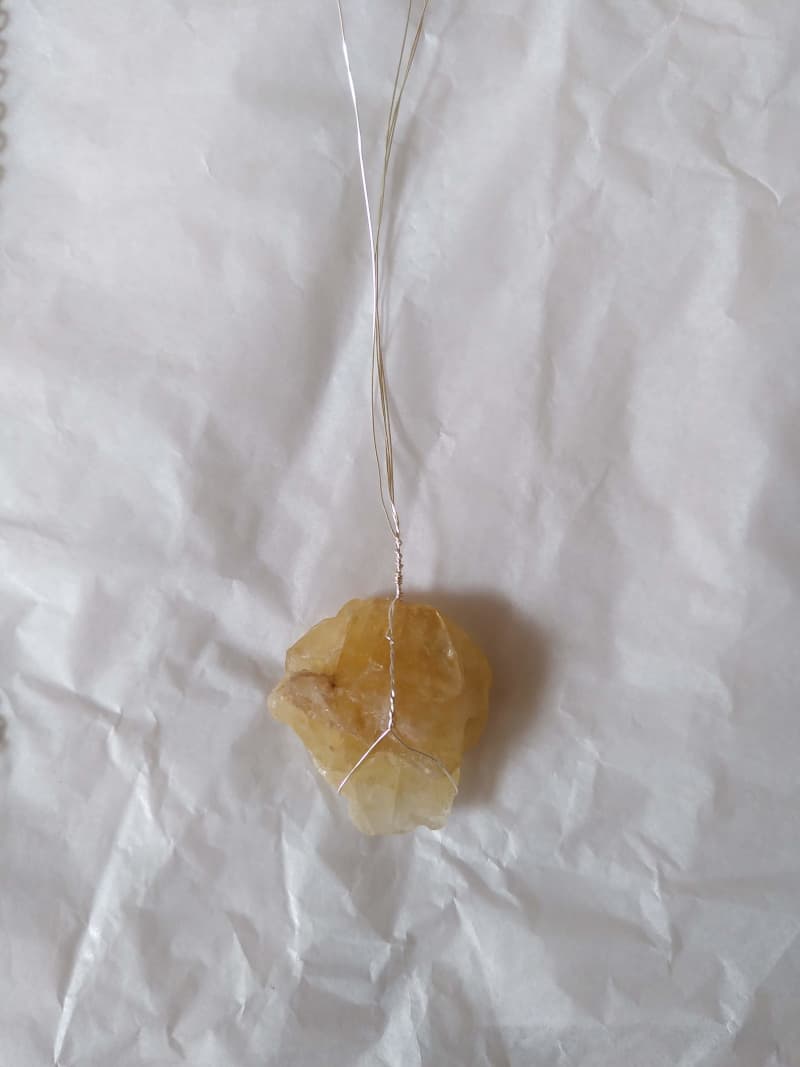
4 – Secure the crystal in place
Bring all the wire up to the top of the stone and twist them all together, securing the crystal in place. Make sure the wire is tight so the stone is safe. If you are using thin wire, such as 0.3 mm, be really careful at this stage not to snap the wire!
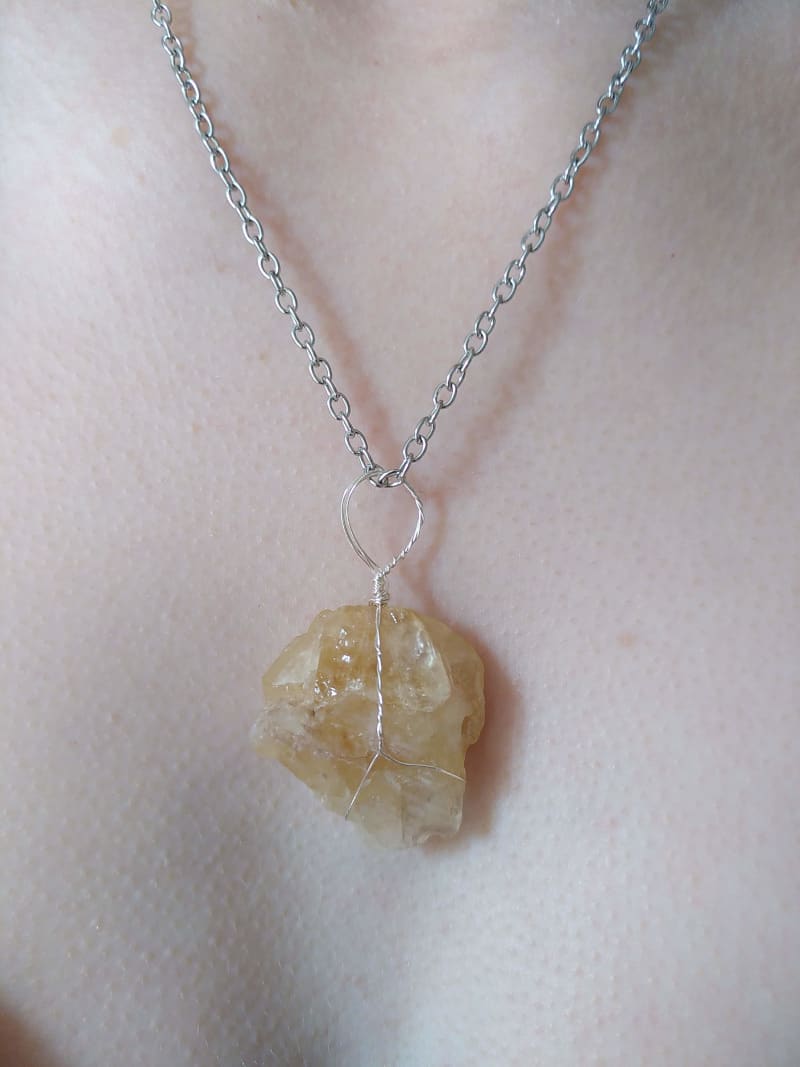
5 – Create a hoop with the wire
With the remaining wire, twist it around in a hoop above the crystal. Trim the wire where necessary and make sure all ends are safely tucked away.

6 -Attach a chain
Finally, bring the chain through the hoop to make your crystal into a necklace! Now, the DIY crystal necklace is ready to wear or give as a gift.
DIY Gemstone Ring
Another crystal healing jewelry-making idea is gemstone rings. These beautiful pieces are great as you can place more than one type of crystal on the ring, allowing you to chose exactly what healing energies you need.
What WIll I Need?
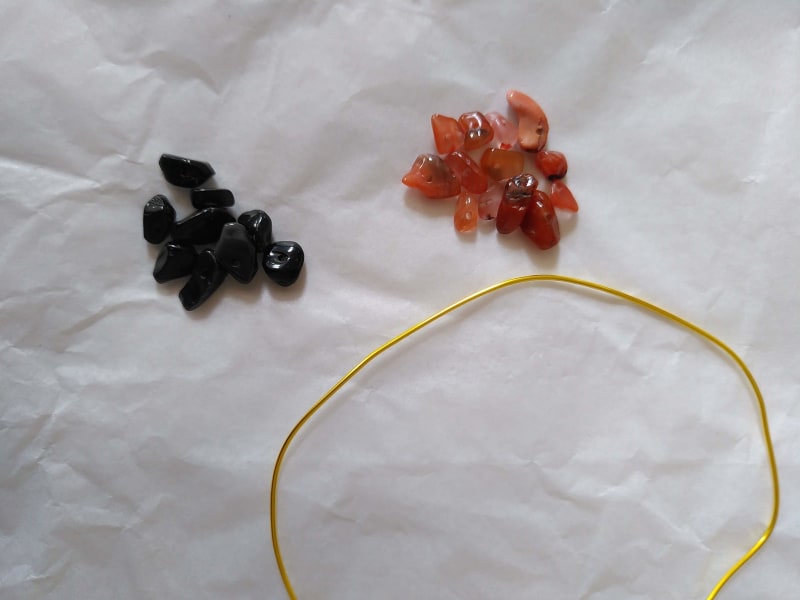
- Crystal healing beads. You can get these from Etsy or Amazon pretty cheaply and often come with holes drilled through them. If you wish, you can drill holes through smaller gemstones yourself if you have the tools.
- Jewelry-making wire. I use 1mm (18 gauge) as this is the perfect size to fit through the beads and strong enough for ring making.
- Pliers or wire cutters.
Step by Step Guide for DIY Gemstone Rings
1 – Cut the wire and place your crystal beads onto the wire
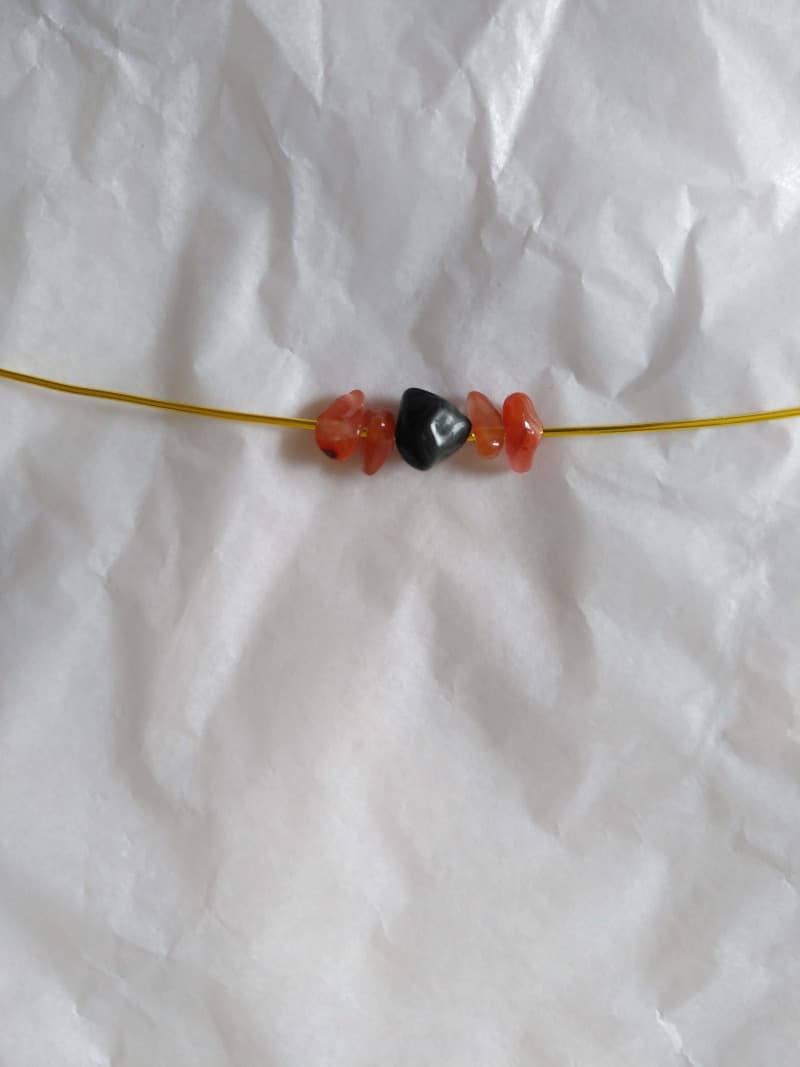
Firstly, cut your wire to around 5 inches. This gives you enough length for the ring. Then, put the crystals onto the wire. You may wish to only put one crystal on, depending on the size of the beads. For this gemstone ring, I am using one obsidian bead and four carnelian beads.
2 – Circle the wire around
Next, circle the wire around to make the ring shape. It is useful to use something to circle the wire around so you know you have the right size. If you wish, you may want to buy a triblet which measures the size of the ring. However, any tubular object will do! I actually use a tube of mascara which I placed one of my rings on first to check it was the right size.
It is also worth noting that you should always be very liberal at this point and make the ring a little bit bigger than you wish. This is because it will most likely end up smaller during the process of twisting the wire.

3 – Circle the gemstones with the wire
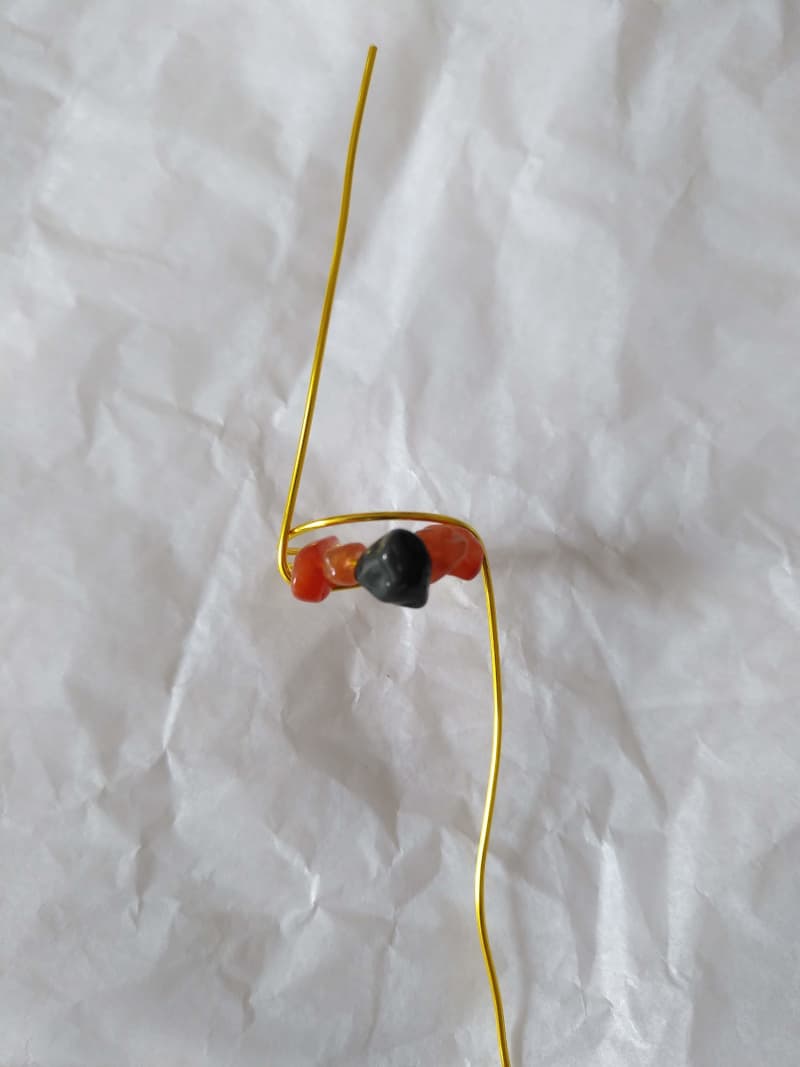
Next, twist the wire up either side of the gemstones to hold them securely in place.
4 -Wrap the wire around the ring
Finally, wrap the wire around the ring wire either side of the gemstones. This can be quite fiddly, so you may want to trim the wire first and use pliers to secure the wire twists. Make sure the wire tips are tucked away safely, or sandpapered down as to not catch the fingers when wearing.
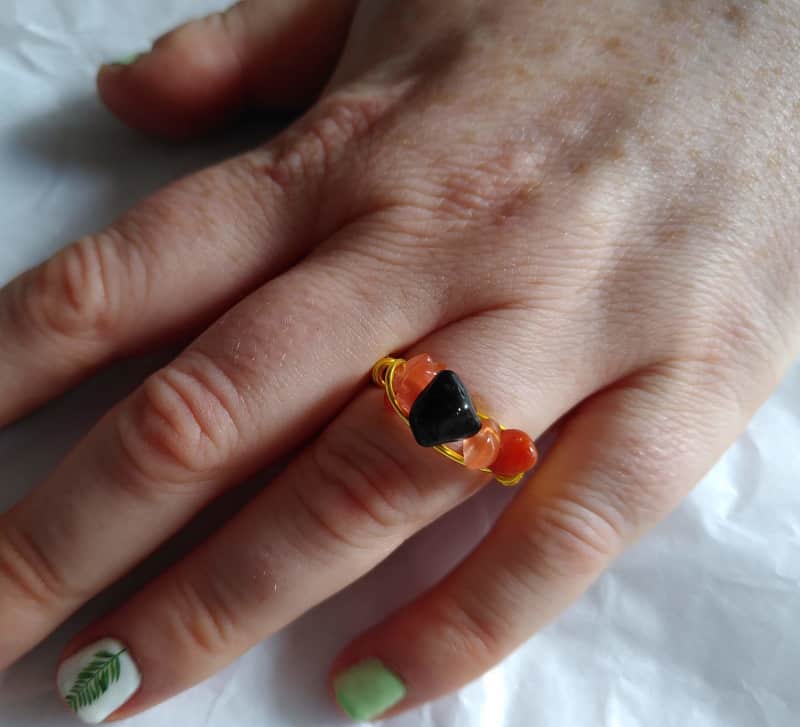
Once the wire is safely twisted and tucked away, put the ring on to check the fit! I love these little rings, they are super cute and great to give people as gifts.
Tips and Tricks for Crystal Healing Jewelry Making
Crystal healing jewelry making is super fun and a really great activity to learn and connect with healing stones. You can create beautiful pieces without spending too much money.
With these rings and necklaces, you can carry the energy of the universe around with you at all times, spreading positive vibes and soaking up the negativity!
Even if you haven’t got crafty for years and don’t think you are a creative type, try it out and you may be surprised! Expressing yourself creatively is great for your mental health and wellbeing.
So what are some tips and tricks for crystal healing jewelry making?
Don’t worry if you haven’t mastered it straight away!
Just like everything else, making DIY gemstone jewelry can take time to get the hang of. Don’t worry if your first few necklaces and rings don’t look right, keep on trying and you will get there!
Actually, this leads me onto the next tip….
They Shouldn’t Look Perfect!
What I love about crystal healing jewelry making is that the thing you end up with looks homemade. Every ring and necklace is unique as it is made by you! It doesn’t have to look perfect, it will look fantastic as you have made it.
Think About The Crystals You Want to Use
It is super important to think about the healing stones that you are wanting to use and for what reasons. All crystals have specific energies and healing qualities, so make sure you know the stones you are using and what they represent.
What I Use for Crystal Healing Jewelry Making
You can buy most things for crystal healing jewelry making online or in craft stores. Here are some craft supplies that I use when making my gemstone rings and necklaces.
Spiral Bead Cages
These are perfect for small and medium crystals to quickly place in and wear. Whatever crystal you need for your day ahead, you can simply put it in these cages, and you are protected!
Healing Crystal Beads
This gemstone selection contains small, predrilled crystals that are perfect for ring making. You get loads of beads in this craft box that are from ten different gemstones.
If these aren’t the crystals you need, look around on Amazon and Etsy because I am sure you will find a selection with the right ones!
Jewelry Making Wire
This 1 mm jewelry-making wire is perfect for DIY gemstone rings. The copper wire comes in gold, silver, and bronze meaning that you have a selection of colors for your rings. Copper is super easy to cut, twist, and shape so perfect for beginners at crystal healing jewelry making!
Jewelry Making Pliers
It is really important to have a decent pair of pliers for jewelry making. They allow you to work safely, cutting and shaping the wire easily. You can purchase pliers pretty cheaply and they last a long time!
Are You Ready To Get Crafty With Crystal Healing Jewelry Making?
I really hope you enjoyed this article and have been inspired to make your own DIY gemstone jewelry. I would love to hear from you and what creations you have been making, so leave a comment if you have been crafting!
If you have the crafting bug after crystal healing jewelry making, check out my article about candle making. This is another super fun way of getting creative and spiritual and you can even use them for some candle magic!
amy smith says
Very nice, love the idea.